|
|
|
Who's Online
There currently are 5885 guests online. |
|
Categories
|
|
Information
|
|
Featured Product
|
|
|
 |
|
|
There are currently no product reviews.
 ;
I'm quite impressed. I had to wait 24 hours for my manual (quite a rare one) but I got it and the quality was good. Also, from trawling the web, these prices are by far the best.
;
Manuale perfetto. Ottimo e utilissimo. Grazie a questo manuale ho potuto realmente risolvere il complesso problema della stampante.
;
Manuale perfetto. Ottimo e utilissimo. Grazie a questo manuale ho potuto realmente risolvere il complesso problema della stampante.
 ;
Was very fast and accurate service. Just what I needed. I recommend to everyone.
;
Very good scan quality, only PC Board scan not enough contrast.
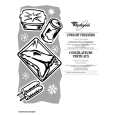
MODEL: WD-52525 / WD-52725 / WD-52825 / WD-62525 / WD-62725 / WD-62825
DIAMOND SHIELD REPLACEMENT
To Remove the Diamond Shield: 1. While wearing soft cotton gloves, loosen the sides of the Diamond Shield by pressing a small plastic card (the size of a standard credit card or a clean, plastic, putty knife) into the middle of the side slot. The Diamond Shield side will snap out of the top middle and bottom clips. Loosen both sides before proceeding to step 2. 2. After the sides are free, gently push down on the top of the Diamond Shield. It will slide out of the top channel. 3 Carefully pull the screen up to remove it from the bottom channel. Store the Diamond Shield in a clean, dust free area, where it will not be scratched.
3
2
1
1
1
1
1
1
To Install the Diamond Shield: 4. Slide the Diamond Shield into the bottom channel, making sure it fits securely. 5. Press gently on the top of the Diamond Shield to slightly bow the screen towards you. Insert the top of the Diamond Shield into the top channel. It should fit securely. 6. At each side, gently press the top, middle and bottom of the Diamond Shield to snap it back into place.
6
5
6
6
6
6
6
4
WARNING
Sharp edges! Always wear gloves to handle, lift, install and remove the Diamond Shield.
Page 17
|
|
|
> |
|